Tools95

MAKE SOMETHING GREAT

PNG to SVG.

Trace PNG logos, icons and illustrations into editable SVG paths. Refine colors and curves, review transparent areas and compare the result before download.

Advertisements
Your image workspace
Temporary server processing
or drag and drop here
PNG
Choose your image to get started.IMAGE
Advertisements
Blog How to trace a transparent PNG into a simple SVG Read the guide

Trace PNG artwork into an editable vector image

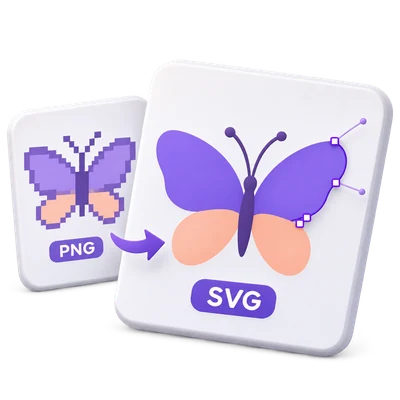
Turn PNG artwork into SVG paths that scale without a fixed pixel grid. Start with a tracing preset, refine colors and curves, and inspect transparent areas in the vector preview.

A PNG logo is reconstructed as vector shapes, with transparent regions reviewed before export.
QUICK VIDEO TUTORIAL How to trace PNG to SVG with the Illustration preset Upload PNG artwork, choose the Illustration preset for a color trace, select Start and download the SVG result. English narration Watch the video

How to trace PNG to SVG with the Illustration preset

Features and controls

Start with clear PNG artwork

Choose Logo for a simple mark, Illustration for color artwork or Line art for dark outlines.

Which preset fits your image

A PNG logo or icon with clean edges is a useful source. Logo starts with eight colors; Illustration starts with sixteen. Line art switches to black-and-white tracing. Avoid enlarging a small PNG just to add pixels: tracing cannot recover missing design detail. The presets remain editable, so compare the result before choosing more detail.

Control the palette

Use Color or Black and white, then adjust the relevant control.

Colors and threshold

Color mode lets you request between 2 and 32 colors; the source may contain fewer usable colors than the requested palette. Black and white uses Black and white threshold from 0 to 255 to decide which areas become dark shapes. These are conventional image-processing and tracing controls; no generative AI is used.

Refine curves and small details

Adjust Detail, Smooth curves and Remove small speckles.

How the controls change the vector

Detail ranges from 1 to 5. Smooth curves changes how closely the paths follow small edge variations. Remove small speckles removes small isolated marks. More detail can increase the path count and file size; stronger cleanup can remove dots or small lettering that you intended to keep. Use the preview to judge the tradeoff.

Review transparent edges

Preserve transparency keeps clear source regions; White adds an opaque canvas.

Existing transparency and opaque images

In Color mode, Preserve transparency retains existing clear regions in the PNG. It does not remove a solid background. Soft shadows and partially transparent edges can become simplified vector shapes. Black-and-white tracing makes light areas transparent; choose White if the receiving layout needs a white canvas. Inspect the preview near small letters and soft edges.

Compare a real vector preview

Select Update preview, then use Original, Vector or Compare.

Preview and final tracing resolution

The selected image is traced for preview at up to 1200 pixels on its longest side. Compare uses a divider to inspect the source and trace. Final conversion traces up to 2048 pixels on the longest side, while the SVG keeps the original dimensions and viewBox. The preview may therefore differ in small details from the final file. Changing a control requires a new preview to show that setting.

Download editable vector paths

Save one SVG or a ZIP containing the batch.

What you can edit afterward

The result contains vector paths rather than an embedded copy of the original bitmap. Open the SVG in a compatible vector editor to adjust paths and fills. Lettering is traced into shapes, not recognized as editable text. Each input uses the same settings and keeps its basename where possible; duplicate names receive a suffix.

Files and processing

Input
PNG
Output
SVG; ZIP for multiple results

25 MB maximum per file. Up to 10 input files per run. 250 MB maximum combined upload.

Sources are limited to 60 megapixels each. Preview tracing uses up to a 1200-pixel longest side; final tracing uses up to 2048 pixels. Resource and output-complexity limits can reject unusually detailed images.

Files are processed on the server. Preview preparation may also upload a file when browser decoding is unavailable or a document preview is needed. Server downloads are available to your session for up to two hours.

For an image result, use Continue to below the download results to choose a compatible next step. You can select which images to carry over; the next tool starts with its own settings.

Refreshing an editor or download page returns you to the tool page. Download the result before starting a new workflow. See our Privacy Policy for file handling.

FAQ

Good to know.

A few answers before you get started.

Temporary server processing
Is the result a real vector SVG?

Yes. The tracing process creates SVG paths and fills. It does not simply place the original PNG or JPG inside an SVG wrapper.

Which images work best?

Logos, icons, line drawings and illustrations with clear edges work best. Photographs can create many shapes and a stylized result, so compare the preview and keep the raster original when photographic detail matters.

Does PNG transparency survive tracing?

Transparent mode retains transparent regions supported by tracing without adding a white canvas. Semi-transparent edge pixels can change as the raster is converted to vector shapes.

Can I edit text in the SVG?

Visible letters become traced vector shapes. They are not editable text objects. Use Image to Text if you need recognized text.

Why is the final trace different from the preview?

Preview tracing is limited to a 1200-pixel longest side, while the final trace uses up to 2048 pixels. A larger final trace may retain more small edges and details. The SVG still uses the original image dimensions.

Advertisements

Language38

English العربية Français Italiano Deutsch Español Português Nederlands Русский Türkçe 日本語 中文 हिन्दी Bahasa Indonesia Bahasa Melayu 한국어 Tiếng Việt ไทย Polski Svenska Українська Norsk বাংলা Ελληνικά فارسی اردو Čeština Dansk Magyar Română Suomi Български Filipino ქართული Slovenčina Azərbaycanca עברית Slovenščina

Choose your language. Video tutorials currently use English narration.