Build the example with four images first, then adapt the ordering, frame duration and canvas to your own photo sequence. Open GIF Maker.
Choose images and arrange the frame sequence
Open GIF Maker and select Images. Upload your pictures or choose Try an example. Common inputs include JPG, PNG, WebP and GIF; the upload form lists the additional supported formats. A batch can contain up to 50 files, with a 25 MB limit per image and overall processing limits.
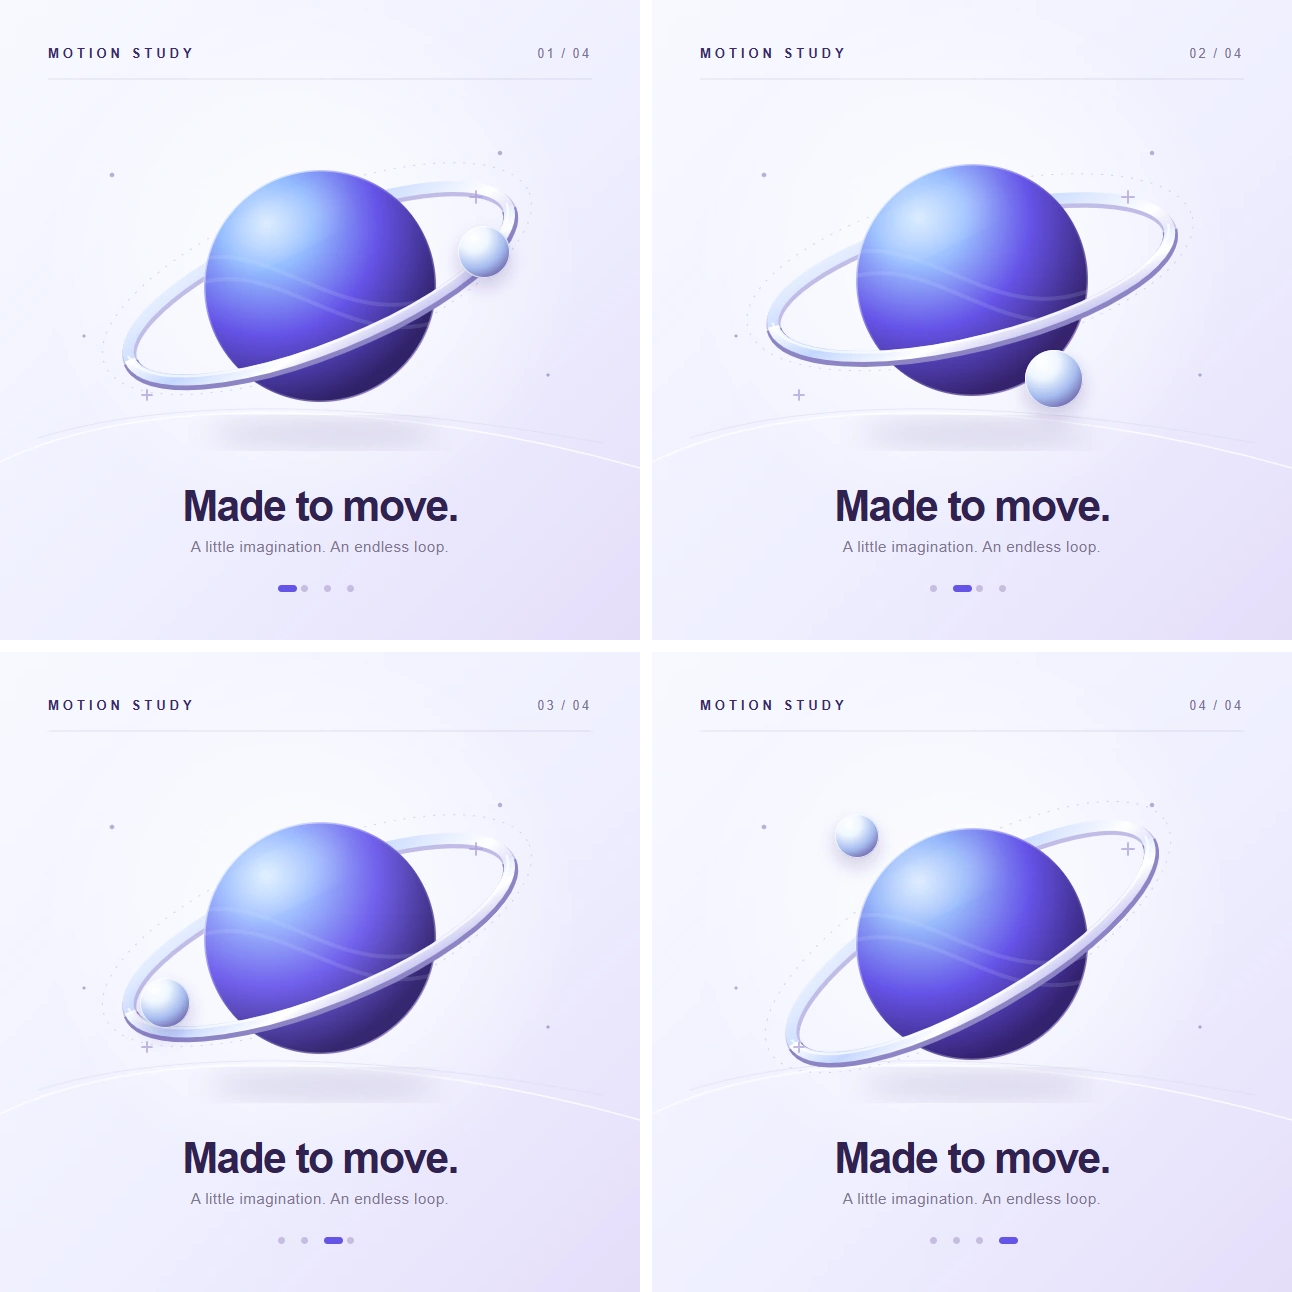
This example uses Try an example to load gif-orbit-01.webp through gif-orbit-04.webp. Each original is 640 × 640 pixels, and the four pictures show different positions in the same orbital scene. Keep their original order for the worked result.
The frame cards sit above the preview. Drag a card to change its position, or select it and use Move earlier or Move later in the settings panel. Keyboard users can select cards with the arrow keys and reorder with Alt plus an arrow key. Play above the preview checks the current sequence.
Duplicate adds another copy of the selected frame. Remove deletes a frame from the sequence while keeping at least one. Undo and Redo recover recent edits; adding or removing a source file starts a new file set and resets that edit history. Use Add images when the sequence needs more pictures.
Use related pictures with a clear progression. A simple sequence is easier to follow than many unrelated photos changing quickly.
Set each frame's duration and choose a transition
Select a frame and set Duration in seconds. The supported range is 0.02 to 10 seconds per source frame. Apply this duration to all frames gives every frame the selected timing. For a slideshow with a title or a detailed final photo, leave that frame visible longer than the rest.
For the example, keep every Duration at 0.65 seconds. Try an example already sets this value; with your own images, enter 0.65 for one frame and select Apply this duration to all frames. Choose Soft fade under Transition and set Transition time to 0.20 seconds, or 200 milliseconds.
Open Text & export quality and keep Transition steps at 4. Each fade adds four intermediate frames. With four original frames, four looping fades, Forward playback and Repeat forever, this example contains 20 rendered frames. The four 0.65-second holds plus four 0.20-second fades make a 3.4-second cycle.
Clean cut switches directly between images without adding transition frames. Slide left moves the next image across the canvas. More transition steps can make a transition smoother, but they use more of the 200-frame export budget. The editor reports when the chosen sequence and effects exceed that limit.
Forward plays the sequence in order, Reverse plays it backward, and Bounce returns through the sequence without repeating both endpoint frames. Loop chooses endless repetition or a fixed number of plays. For the worked example, keep Forward and Repeat forever.
Duration is the hold before a transition; Transition time is added to it. Four photos at 0.65 seconds do not make a 2.6-second loop when fades are also enabled.
The example in this guide
Four example images in their original order; 0.65 s per frame; Forward; Repeat forever; Soft fade; 0.20 s transition time; 4 transition steps; Square 640 × 640 px; Show the whole image; centered at 100% zoom; first-frame caption "Made to loop."; Bottom; 32 px; white; 256 colors; Smooth color gradients and Optimize file size enabled.
- Source images
- 4 WebPs · each 640 × 640 px
- Frame timing
- 0.65 s hold + 0.20 s fade
- Downloaded GIF
- 640 × 640 px · 20 frames
- Animation cycle
- 3.4 seconds · repeats forever
Choose the canvas, reframe images and add captions
Under Canvas & background, choose Square · 1:1 for the example and keep Width and Height at 640 px. Other presets include Portrait, Story, Landscape and Widescreen. Match first image starts from the first image's shape, while Custom size accepts dimensions from 16 to 1600 px per edge, subject to the animation's total processing limit.
Image fit offers Show the whole image and Fill the canvas. Show the whole image at 100% zoom keeps all the source edges and can leave background around a differently shaped picture. Fill the canvas covers the output area and can crop the edges. Set Background to the desired fill or enable Transparent background when the destination needs it.
Select a frame to change its framing independently. Drag the preview or change Zoom, use Left or Right for 90-degree rotations, or Flip to mirror it. Reset frame returns that frame to centered, unrotated framing at 100% zoom. The example keeps all four original square pictures centered and uses Show the whole image.
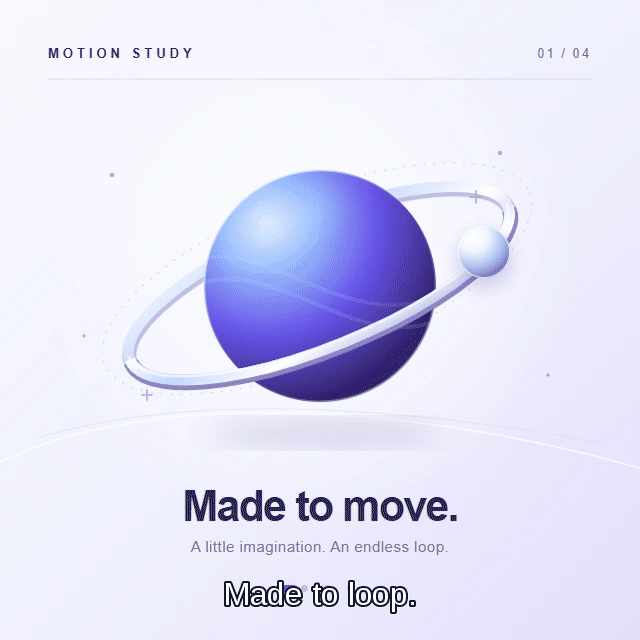
Select the first frame and enter Made to loop. in Caption. Leave the other three captions empty. Under Text & export quality, keep Caption position at Bottom, Caption size at 32 px and Caption color white. Captions belong to individual frames; selecting another frame lets you write a different line. The example's first caption fades away with its frame.
Keep GIF colors at 256 · more detail, with Smooth color gradients and Optimize file size enabled for the worked result. Lower color counts can make a lighter file but may change subtle shades. Smooth color gradients uses dithering, which can soften color bands while adding a visible fine pattern.
Check every frame after changing the canvas shape. A composition that fits one picture can crop the subject in another. Increasing output dimensions cannot restore detail missing from a small source.
Create the GIF and review the downloaded animation
Play the preview and watch a complete cycle, including the return from the last frame to the first. Check that captions stay visible long enough, the crop is consistent and no frame feels rushed. Select Create GIF when the sequence is ready; the server renders the final animation from the uploaded originals.
The worked example downloads animation.gif at 640 × 640 pixels. The real output has 20 frames, a 3.4-second cycle and endless looping. The comparison above shows the four original images as a contact sheet and the actual first frame of that downloaded GIF, including the added Made to loop. caption.
The article images are still previews, not an animation player. Open the downloaded GIF in an app that supports animation to check timing and the loop. A preview that looks smooth can still gain color changes after GIF palette conversion, so inspect the saved result before sharing.
For a smaller result, try fewer source frames, shorter transitions, fewer transition steps, a smaller canvas or a lower GIF colors value. Shortening the hold time alone does not remove image frames, so it may change pacing without reducing file size much.
Download before refreshing or leaving. Refreshing the editor or download page returns to the main tool page. Keep your original images because the exported GIF is a flattened animation, not a project file containing the editable source controls.
A static image viewer may show only the first GIF frame. Test the file in a browser or another animation-capable viewer before concluding that the animation is missing.
Common questions
Can I make a GIF from JPG and PNG images together?
Yes. Images mode can combine supported image formats in one sequence. Each input becomes one or more timeline frames. Choose a shared canvas size and check the fit of each image.
Can each image stay on screen for a different time?
Yes. Select a frame and change Duration. Apply this duration to all frames is optional; leave it unused when the pictures need different hold times.
Why does the GIF have more frames than the number of photos?
Soft fade and Slide left insert transition frames, and Bounce adds a return sequence. An uploaded animated file can also contain several frames. The 200-frame limit applies to the rendered animation, not just the number of uploaded photos.
Can I put a different caption on every image?
Yes. Caption applies to the selected frame. Select each frame to enter its text. Caption position, size and color are shared styling controls for the animation.
Can the GIF have a transparent background?
Yes. Enable Transparent background under Canvas & background. GIF supports fully transparent pixels rather than PNG-style smooth partial transparency, so soft edges can change. Check the downloaded result against its intended background.
Why are some edges of a photo missing?
Fill the canvas and extra Zoom can crop source edges. To keep a complete picture, choose Show the whole image, set Zoom to 100% and use centered framing. A different canvas shape may leave visible background around it.
Does making the GIF play faster make its file smaller?
Not necessarily. A shorter hold changes timing but keeps the same frames. Reducing dimensions, the number of rendered frames or the color count usually has a more direct effect on file size.
Are all the images processed in my browser?
No. The browser displays the interactive composition, but frame previews and final GIF encoding use server processing. The final file is rendered from the uploaded originals and the selected settings.
Turn your pictures into a loop with a clear rhythm
Try a sample or use your own file, and review the result before sharing.