
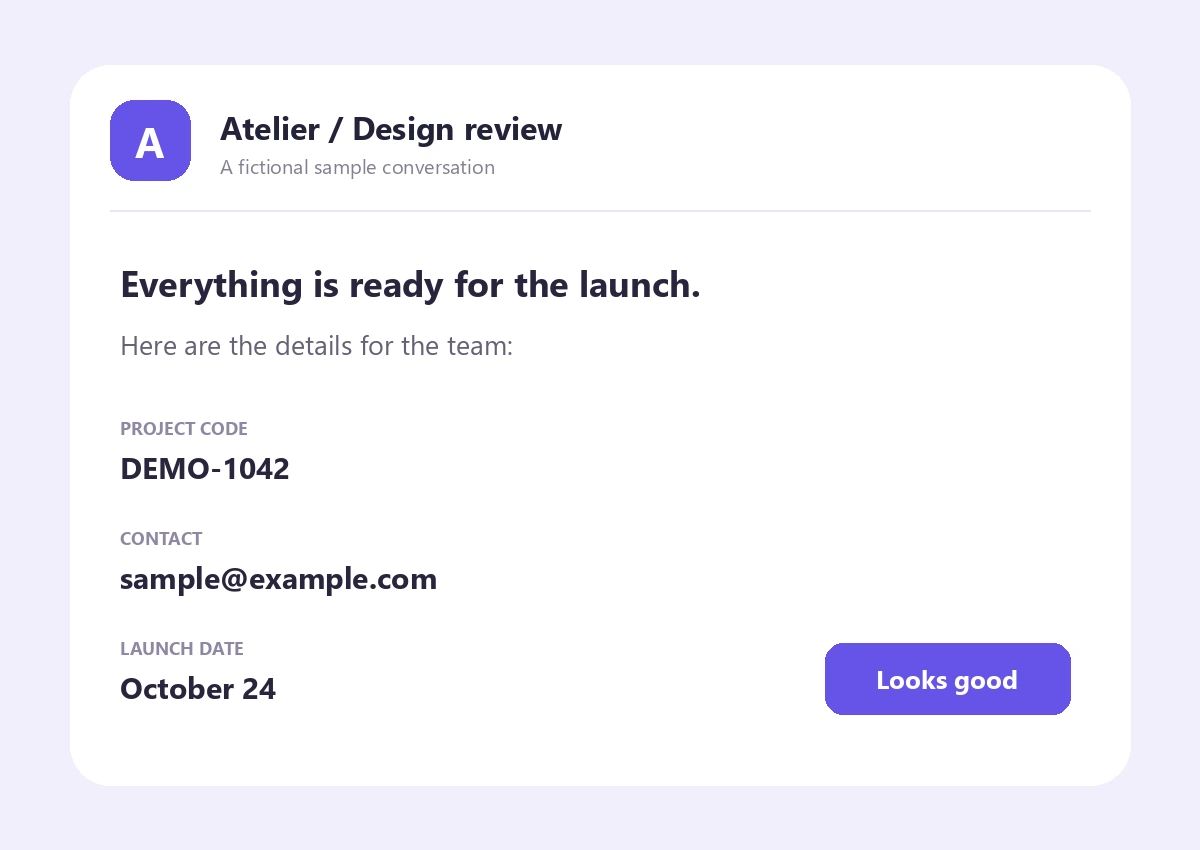
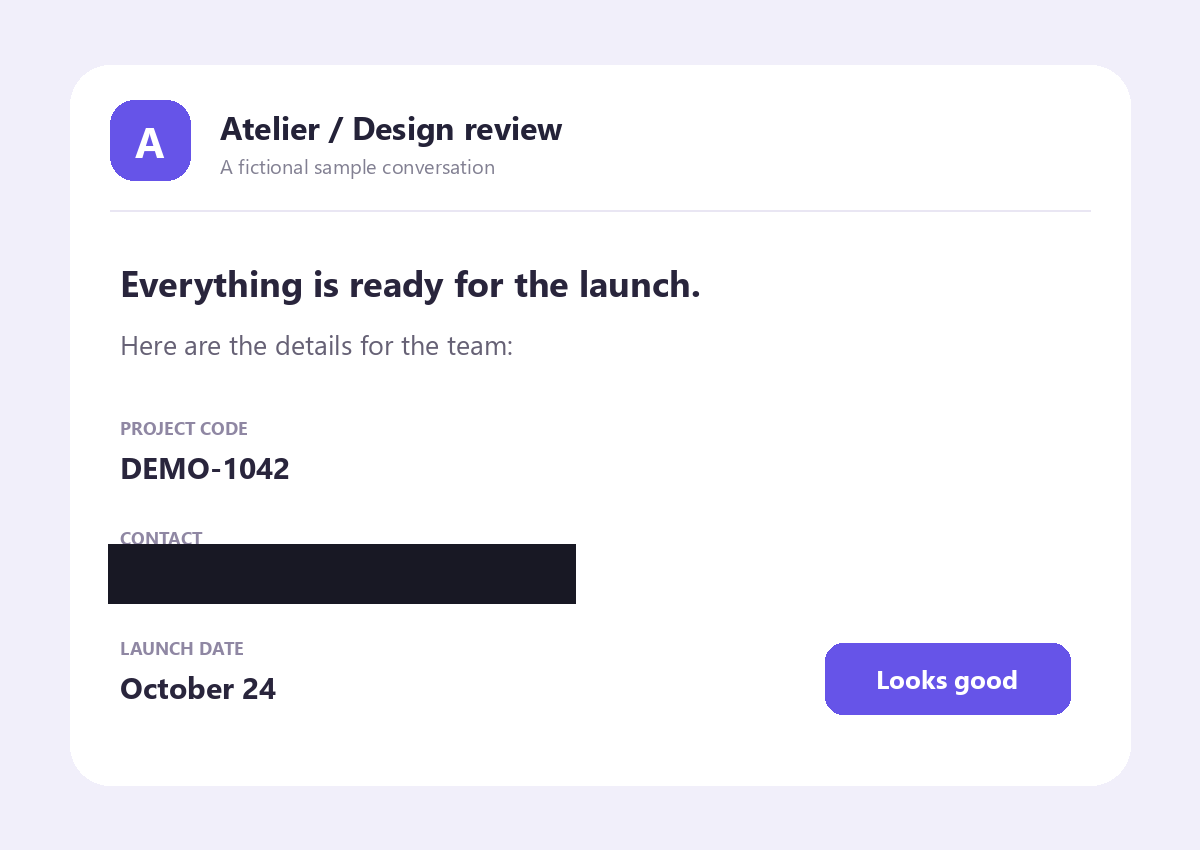

Open Blur, Pixelate & Redact Image, draw a region over the detail and choose its effect. Use Opaque redact when the information must be removed from the shared picture, then export a flattened image. This example covers a fictional email address in a sample message. Open Blur, Pixelate & Redact Image.
Choose the image and find every sensitive area
Open the tool and upload one image or open the sample. The sample message contains fictional content, including sample@example.com, so it can be used without exposing personal information.
Before editing, review the complete image. Names can appear in headers, message previews, reflections or small labels. This tool does not automatically locate private information.
Supported inputs are JPG, PNG, WebP, GIF and BMP, up to 25 MB and 32 megapixels. The source is decoded in your browser and the first still frame is used for animated inputs.
Make a separate edited copy. Your original file on the device still contains the information you are covering.
Draw and refine a rectangle
Drag over the entire contact line in the sample. The worked region starts at approximately 9% from the left and 64% from the top, with 39% width and 7% height.
Select a region to move it. Drag its lower-right handle to resize, or use Left, Top, Width and Height percentages in settings. Add region creates a centered rectangle that can be positioned with those fields.
You can add up to 60 regions. The selected-region menu helps distinguish them. Arrow keys move a selected region, Shift plus arrows resizes it and Delete removes it. Undo and Redo recover recent changes.
Cover the complete detail, including the edges of every character. A small visible fragment may still disclose information.
The example in this guide
Fictional message sample at 1200 × 850 px; one rectangle over the contact value; Opaque redact in #181824; approximately x 9%, y 64%, width 39%, height 7%; PNG export.
- Source
- 1200 × 850 px
- Region
- Contact value only
- Effect
- Opaque redact / #181824
- Output
- Flattened 1200 × 850 PNG
Choose opaque redaction, pixelation or blur
New regions start with Pixelate at Strength 20. For the email address in this example, open Settings and change Effect to Opaque redact. Its solid color replaces the selected source pixels. Keep the default dark color, #181824, to cover the contact value.
Pixelate and Blur offer a Strength slider. They can be useful for a visual effect or reducing distraction, but patterns and text can remain recognizable. Neither should be treated as a guarantee of privacy.
Each region keeps its own effect. You can blur a distracting background detail and use opaque redaction over a contact address in the same picture. Delete region affects only the active rectangle; Clear all removes the complete set and can be undone.
A strong-looking blur is not equivalent to removing the covered information. Use opaque coverage for sensitive details.
Download and review the flattened result
Keep Save as at PNG and select Start. The output retains the original 1200 × 850 dimensions in this example, applies the region and removes the editing overlays.
Download saves a flattened image with no original EXIF metadata or editable redaction layers. The example comparison uses that actual downloaded PNG, not a simulated overlay.
Open the saved file and check the contact line at full size. Also review other parts of the image before sharing. Keep the edited output separate from the original so you do not accidentally send the unmodified source.
PNG preserves rendered pixels without lossy compression. JPG and WebP are also offered, with an Image quality control. JPG fills source transparency with white.
Redaction is permanent in the exported pixels. Keep the source separately if you want to adjust the region later.
Common questions
Can I use blur and redaction on different areas?
Yes. Each region has its own mode, strength and color. Select the region before changing its effect.
Can someone remove the redaction layer?
The exported image has no editable redaction layer. Opaque redact replaces the covered pixels. The original file on your device still contains the original information, so share only the reviewed output.
Is blur suitable for private text?
Opaque redact is the appropriate choice when the text must be removed from the shared image. Blurring or pixelating can leave clues or readable detail.
Can I undo after downloading?
The editor retains recent region history while the current workflow remains open. The downloaded file is flattened and cannot restore the covered source pixels.
Does the original image leave my browser?
Not for this tool’s image processing. Supported files are decoded, previewed and exported locally. It does not require an AI service.
Why does a new rectangle look pixelated?
Pixelate is the default effect, with Strength 20. Select that region and change Effect to Blur or Opaque redact. Choose opaque coverage for sensitive text and check the saved result.
Make your own carefully checked result
Try a sample or use your own file, and review the result before sharing.